Route 53
Amazon Route 53 is a highly available and scalable Domain Name System (DNS) web service. You can use Route 53 to perform three main functions in any combination: domain registration, DNS routing, and health checking.
When users request your website or application, for example, by entering the name of your domain in a web browser, Amazon Route 53 helps to route users to your resources, such as an Amazon S3 bucket or a web server in your data center. To configure Route 53 to route traffic to your resources, you do the following:
- Create a hosted zone You can create either public or private hosted zone. If you want to route internet traffic to your resources, you will use Public hosted zone. It requires you to have a domain registration. For the purpose of this lab, we will setup a Private hosted zone for private DNS service, so you don’t have to purchase for a domain registration. The private zone will be attached to VPC, so only resources is VPC can access it.
- Create records in tho hosted zone
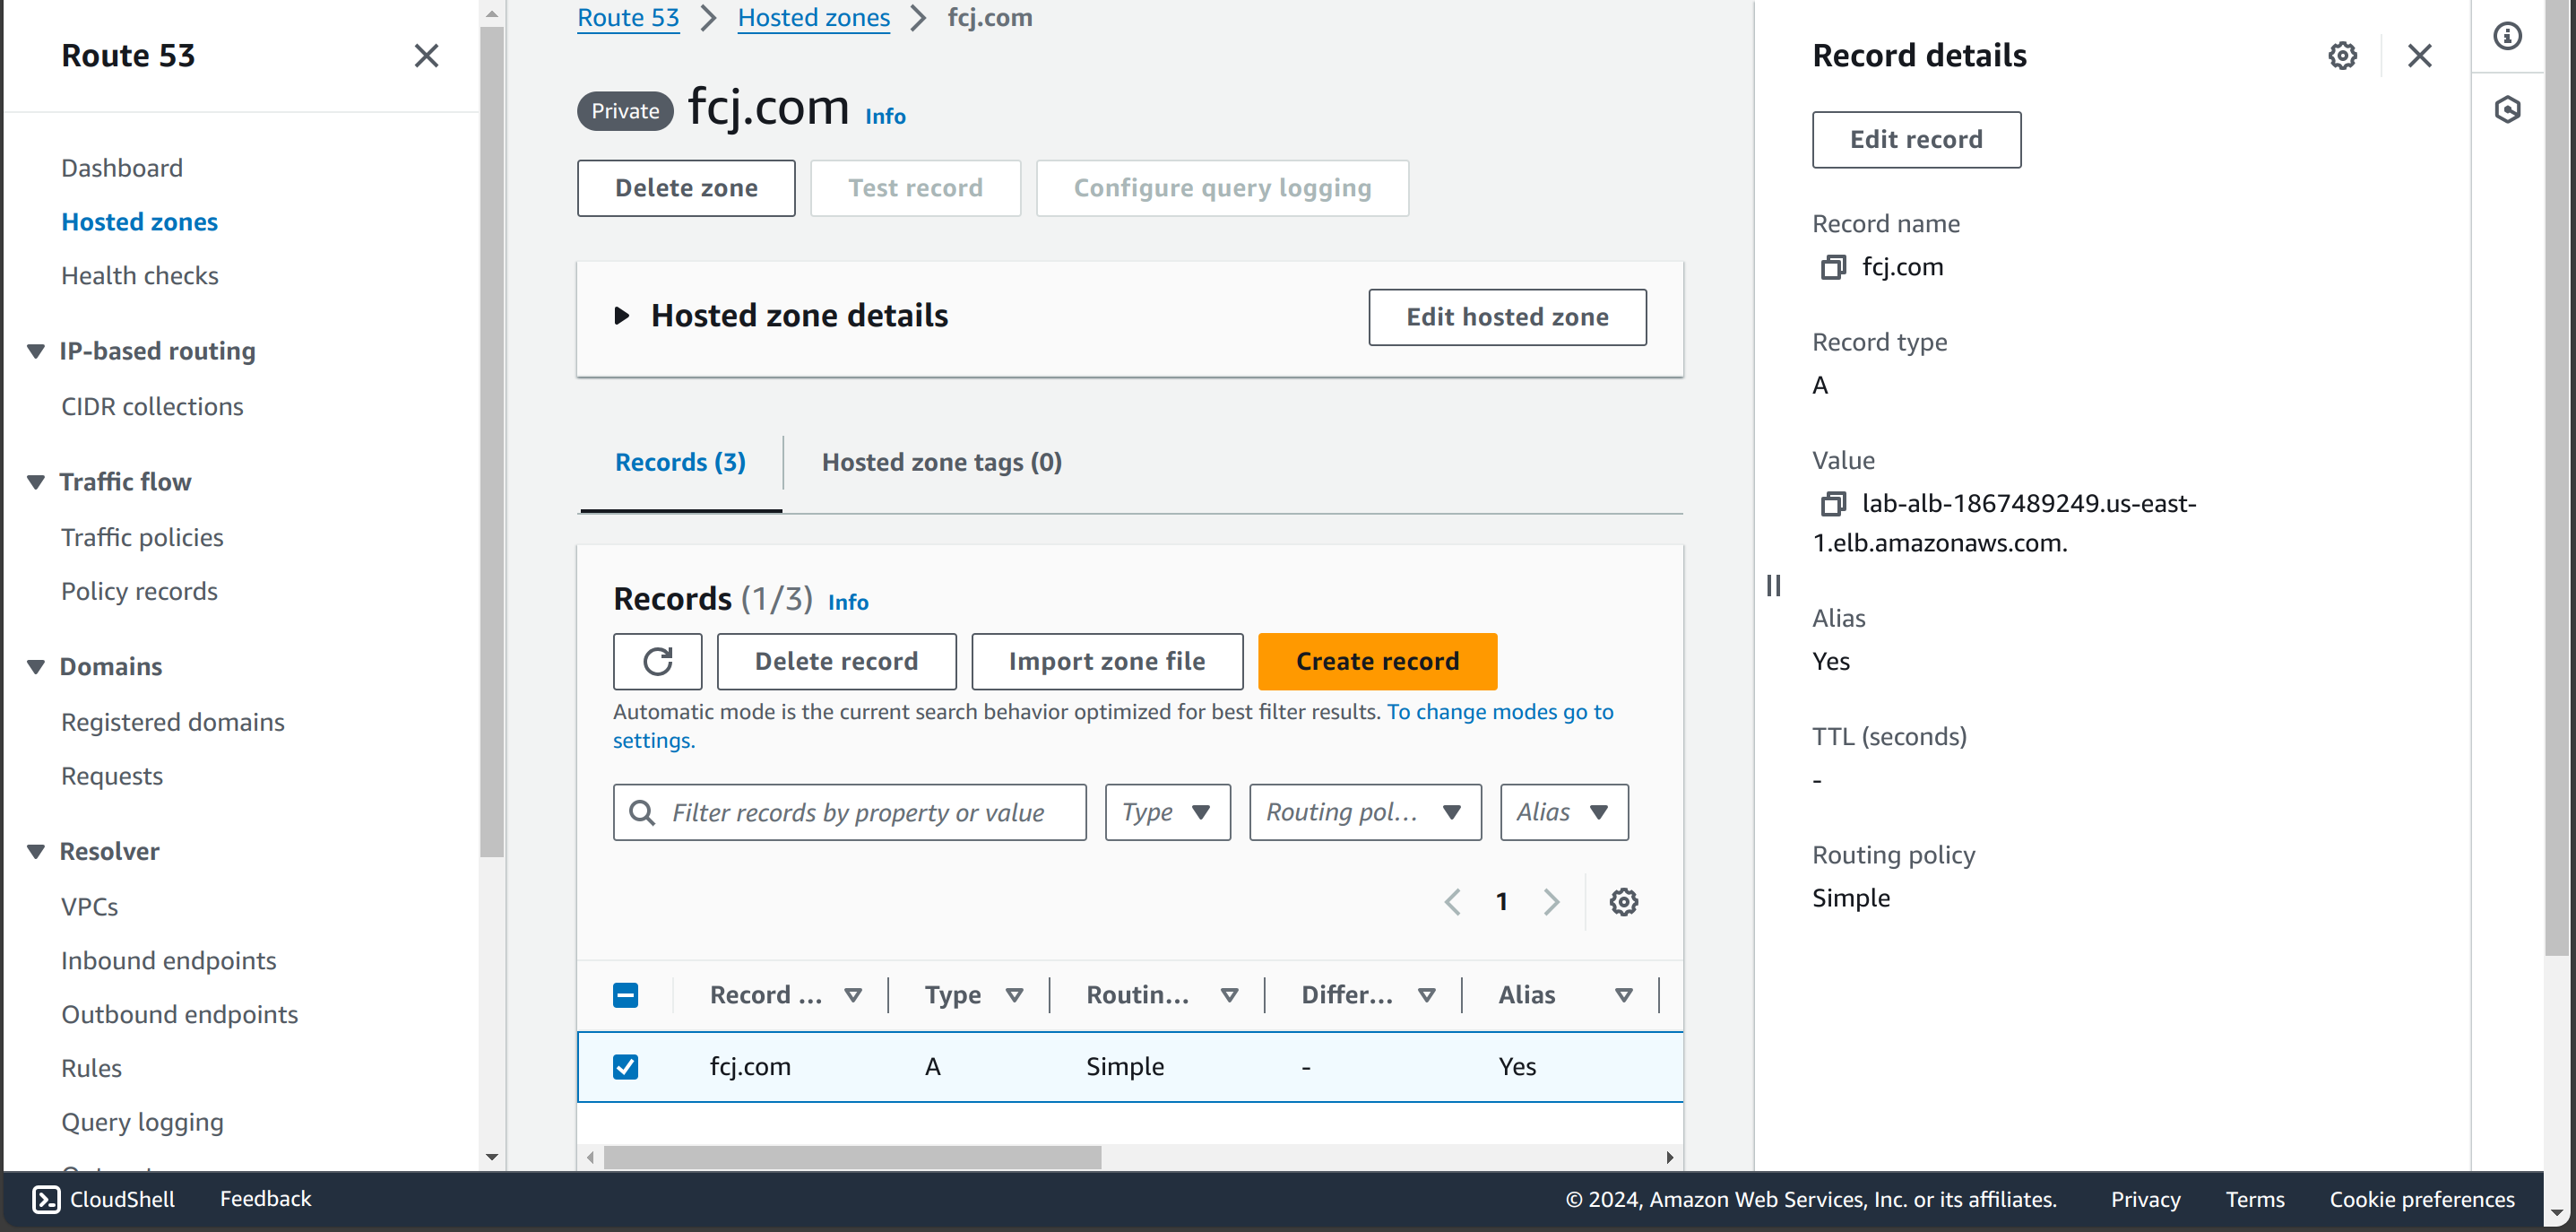
Records define where you want to route traffic for each domain name or subdomain name. We will setup Alias record to map
fcj.comdomain to the Application Load Balancer created before.
Amazon Route 53 alias records provide a Route 53–specific extension to DNS functionality. Alias records let you route traffic to selected AWS resources, such as CloudFront distributions, Amazon S3 buckets, ALB DNS name. Alias record has 2 big advantages are:
- They can map a DNS name to zone apex. It is an unofficial feature in DNS. You can refer to this post
- Alias record is alternative for CNAME record. If you use CNAME, you will pay for queries to AWS resources, which used to define the resource address or health checking.
aws_route53_zone block define a private hosted zone name fcj.com and connect it to our VPC.
aws_route53_record helps to map an Alias record to ALB.
############### Route53 ###############
resource "aws_route53_zone" "fcj" {
  name = "fcj.com"

  vpc {
    vpc_id = module.vpc.vpc_id
  }
}

resource "aws_route53_record" "apex" {
  zone_id = aws_route53_zone.fcj.zone_id
  name    = "fcj.com"
  type    = "A"

  alias {
    name                   = aws_lb.lab_alb.dns_name
    zone_id                = aws_lb.lab_alb.zone_id
    evaluate_target_health = true
  }
}

Console result
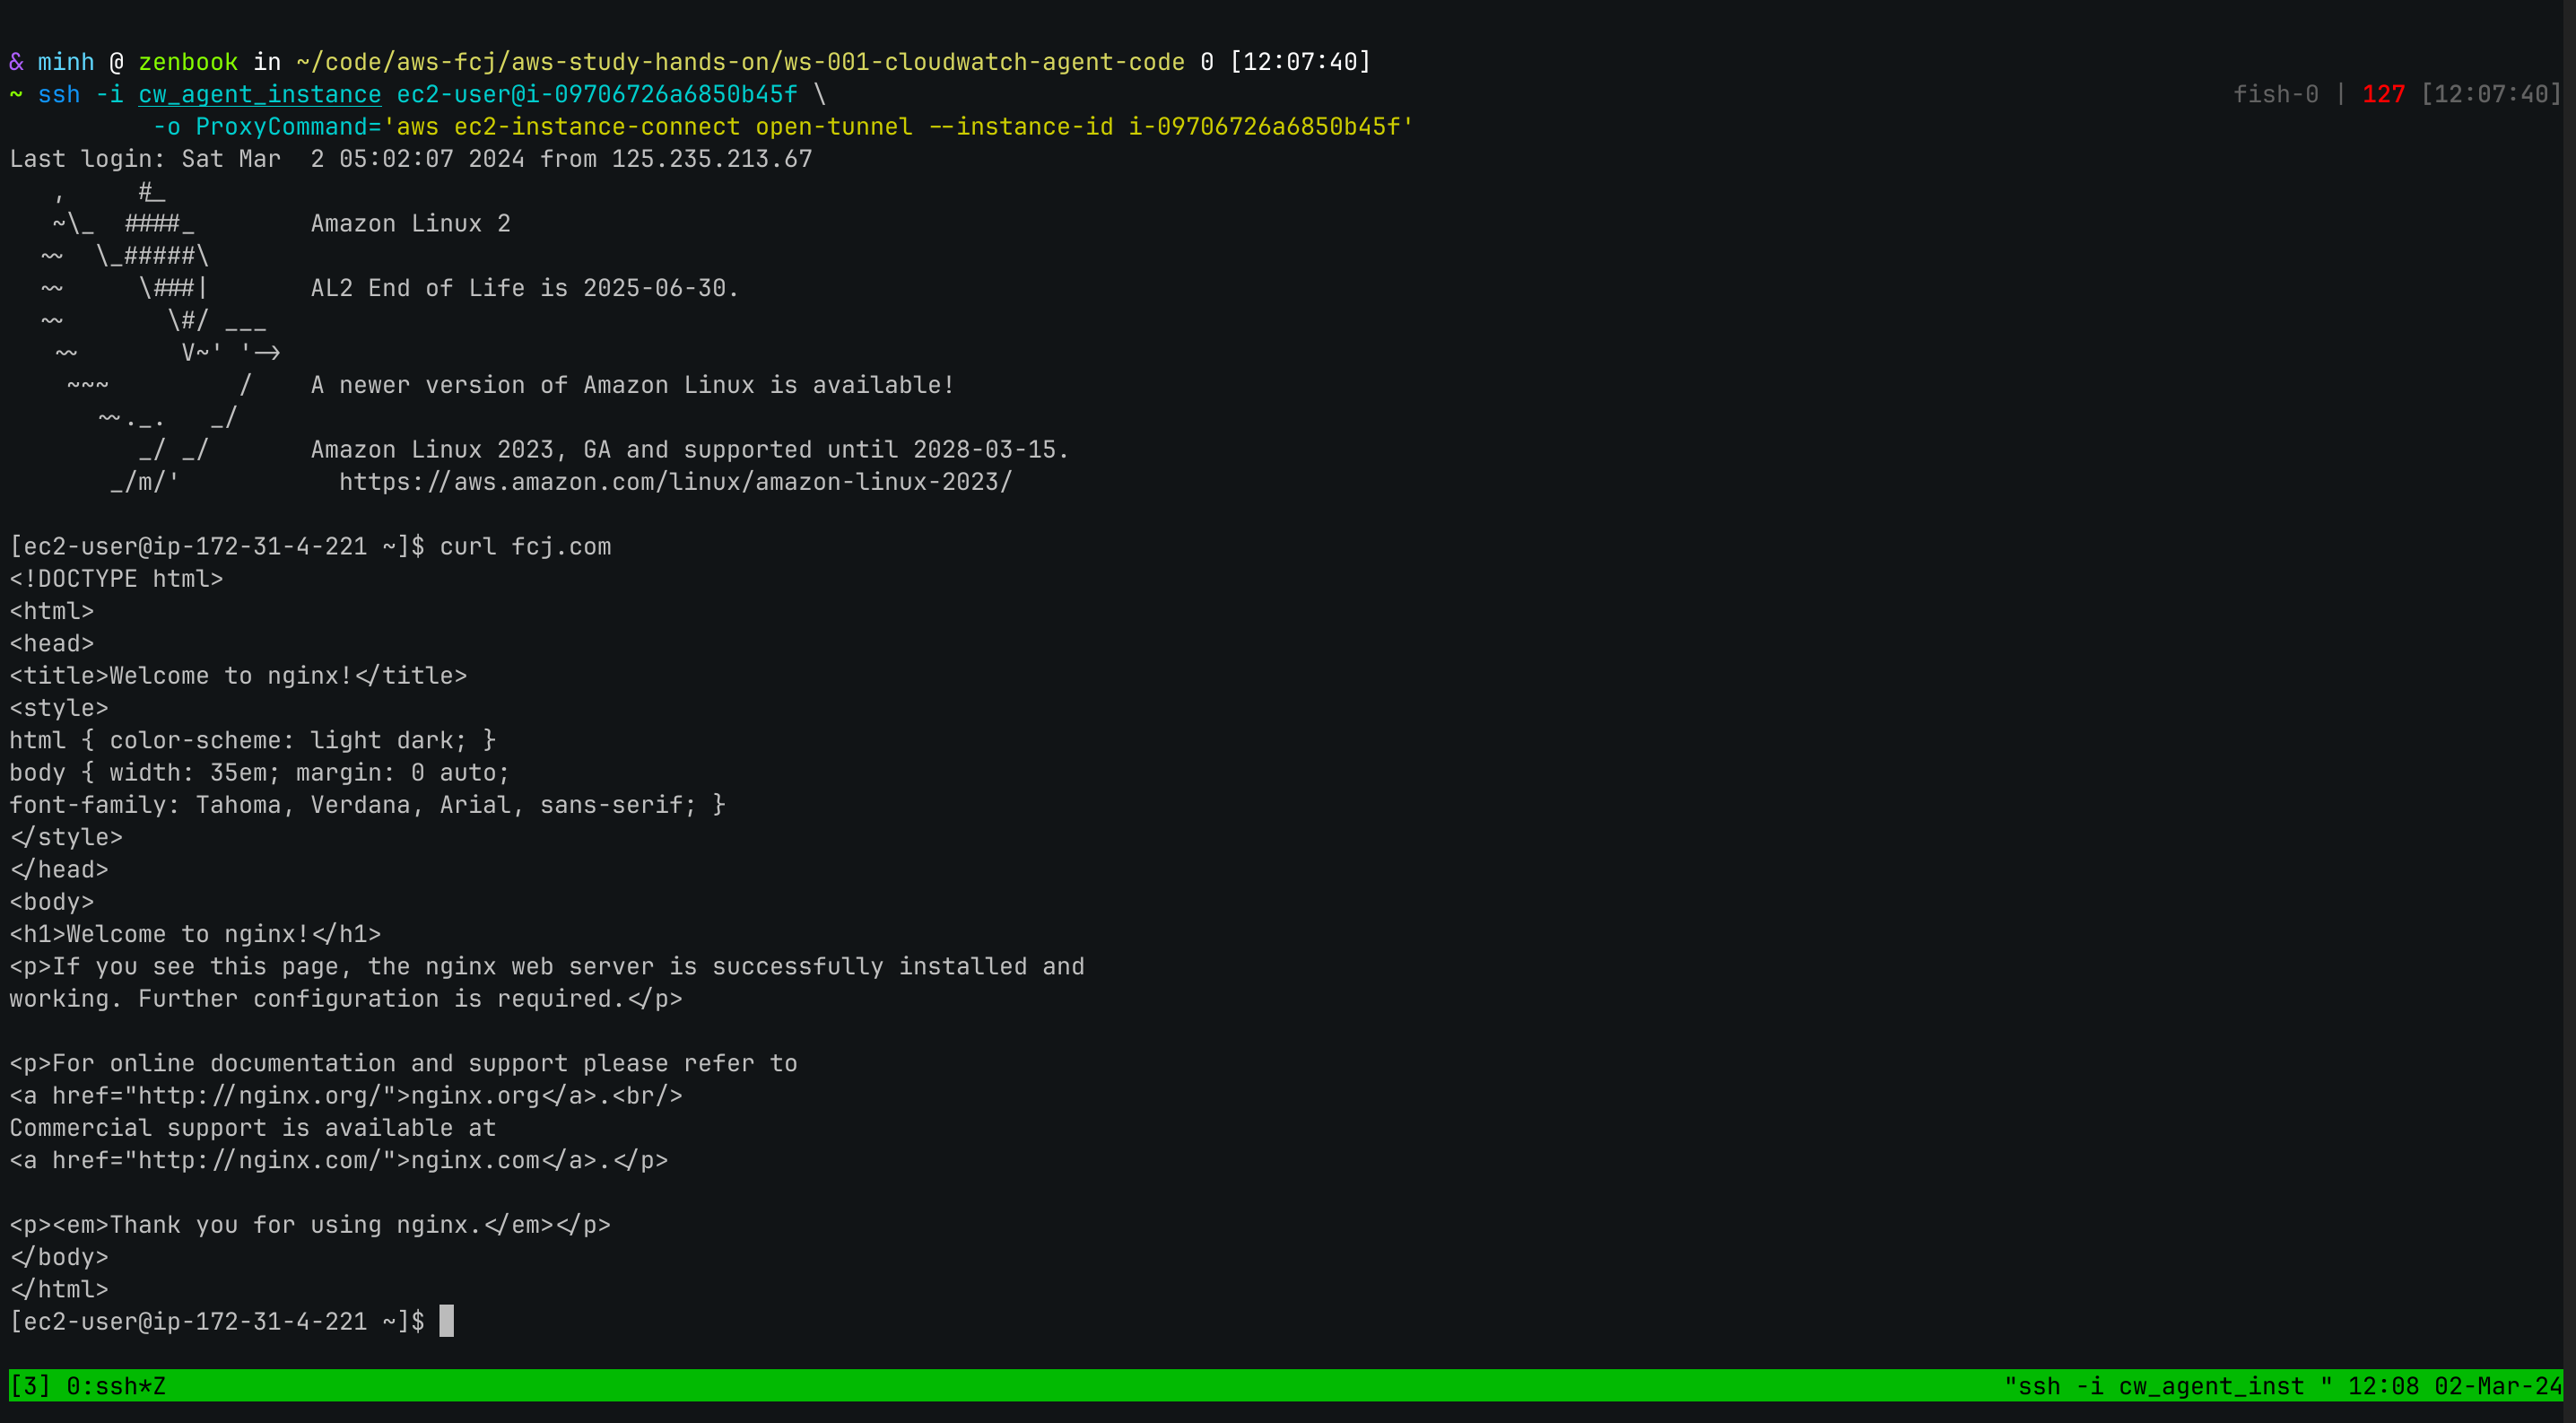
Check DNS query To check DNS service feature, we will do the following step:
-
Access to EC2 instance through Private EC2 Instance connect endpoint. First, we need to get the private SSH key created and saved in Terraform state, change permission for only read-only and run AWS CLI to connect through terminal:
   $ terraform output -raw private_keypair > cw_agent_instance
   $ chmod 400 cw_agent_instance
   $ ssh -i cw_agent_instance ec2-user@INSTANCE_ID \
       -o ProxyCommand='aws ec2-instance-connect open-tunnel --instance-id INSTANCE_ID'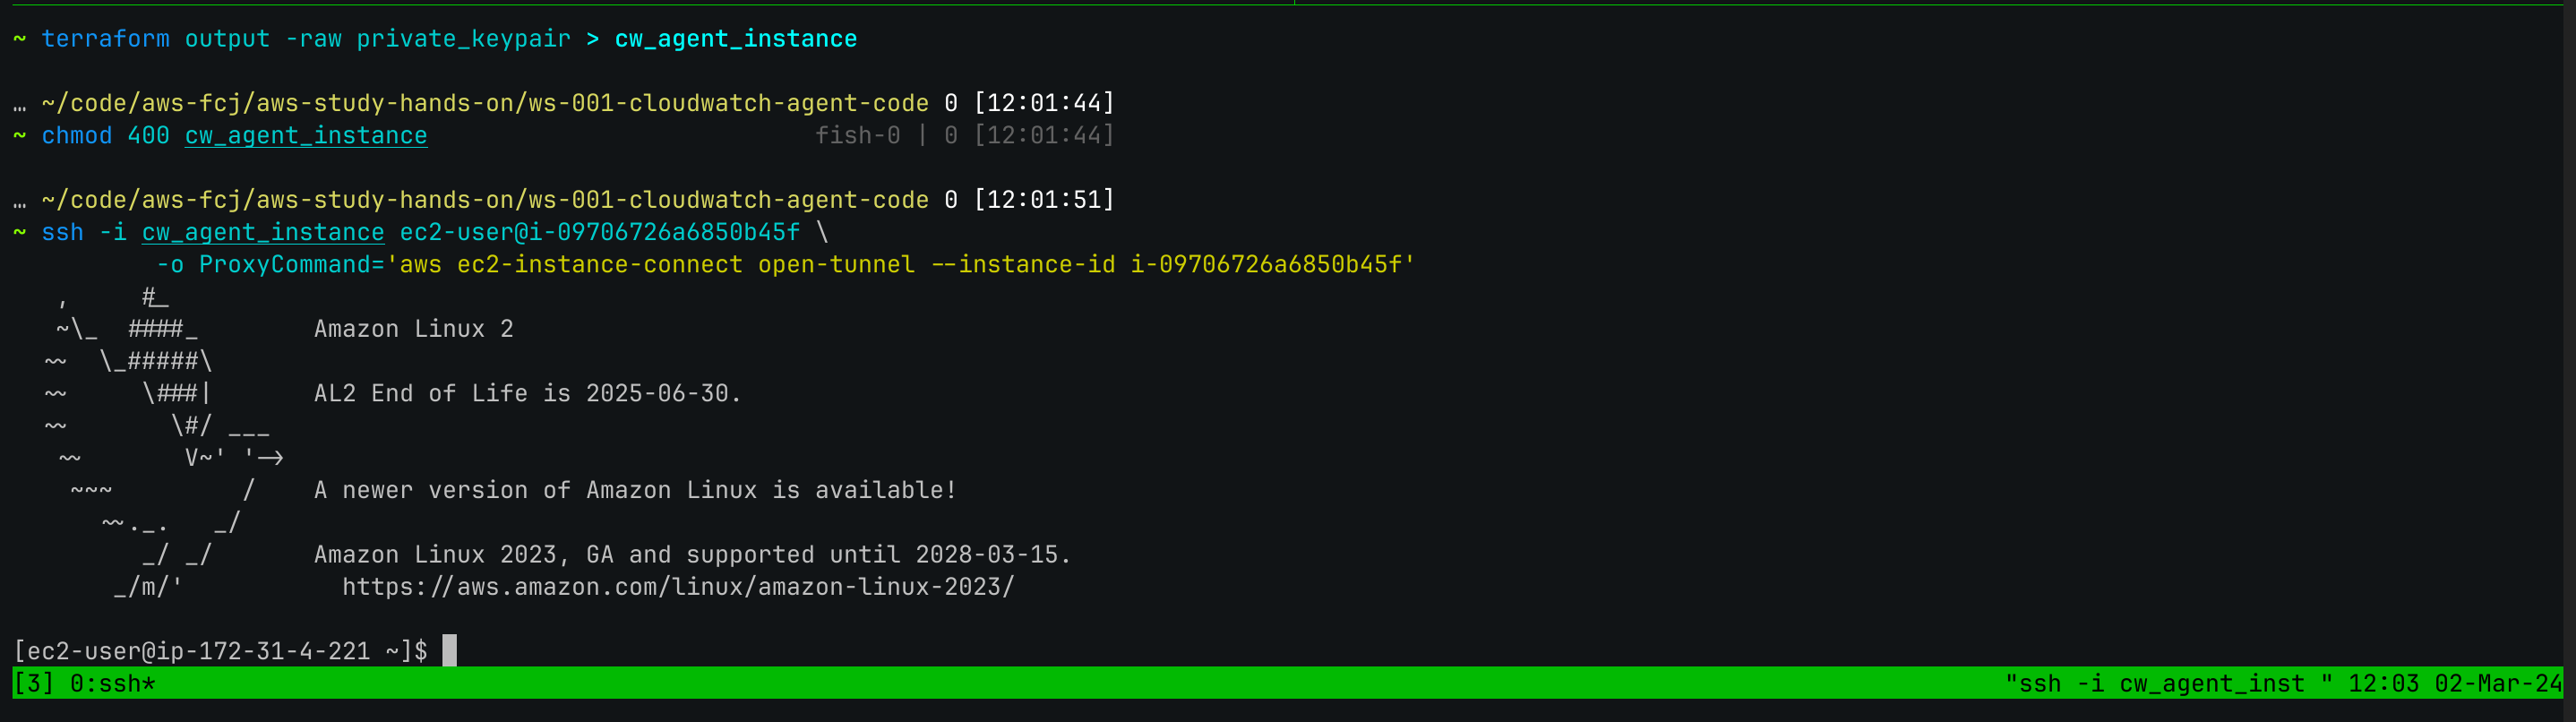
-
Call a query to
fcj.comdomain Now use curl to query our web server by Custom DNS name.